Are you looking to squeeze even more style and versatility out of your Gelato Blouse + Dress pattern? Imagine giving it a fresh new look just by adding an elastic casing or a drawstring. It’s a simple modification that can completely transform the silhouette. Let me walk you through the process.

For the best results, I recommend using fabrics that are soft and drapey, like rayon. I experimented with different looks—using cotton sateen for the cream dress and a rayon for the navy floral version.
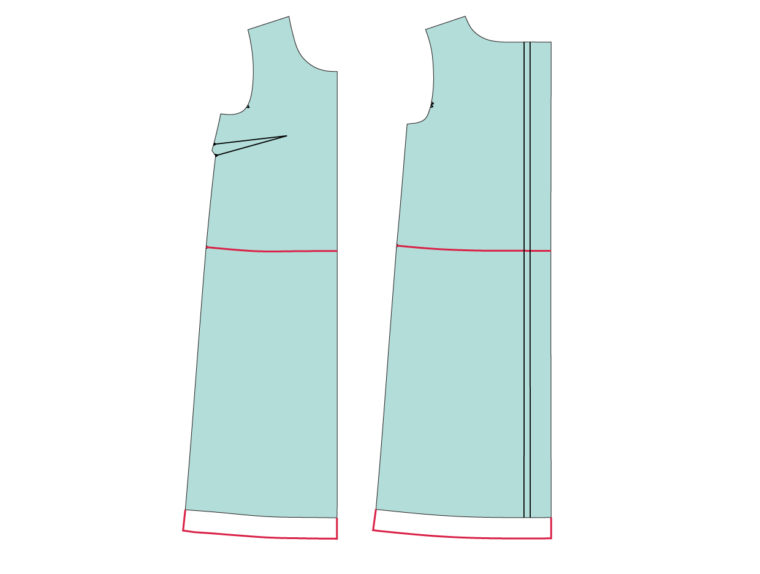
First off, here's a handy tip to make adding the casing easier: When you're cutting out your front and back pattern pieces, trace the cut line for the blouse onto the wrong side of your fabric. This gives you a guideline for where to place the casing. Feel free to adjust the waistline slightly, but this line will serve as your starting point.
To trace the line, you can pin along the cut line and then mark the pin positions with chalk or a water-soluble fabric pen. Connect the dots once you've marked all the points. Another option is to use a tracing wheel and tracing paper to transfer the line without marking the fabric permanently.
Keep in mind that you might want to add a touch more length to the dress since cinching the waist can make it appear shorter. As you cut your pieces, factor this into your measurements.
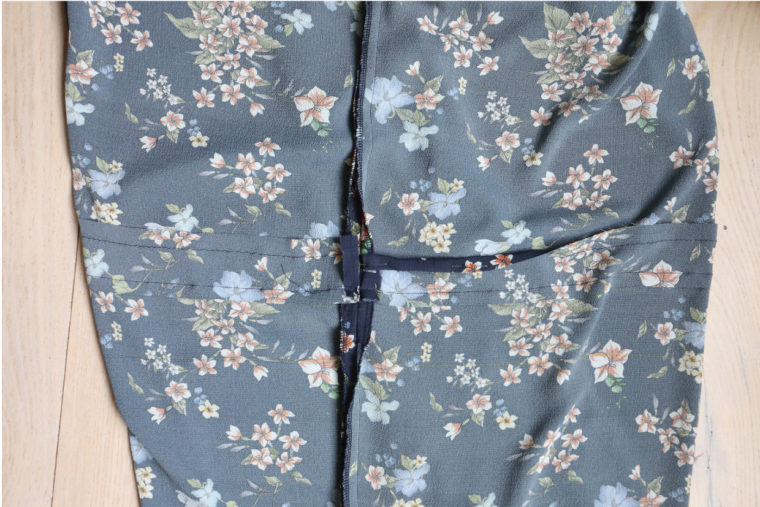
Next, cut a strip of fabric that’s about 1 1/2 inches wide and slightly longer than the circumference of the waistline. Cutting from selvage to selvage will give you a good length. Sew a basting stitch 1/2 inch from one long edge of the strip. Use this as a folding guide to press the seam allowances toward the wrong side of the fabric.
Once you’ve assembled the dress according to the instructions, try it on to check the placement of the casing. I flipped mine inside out so I could blouse the bodice and compare the traced line to the position of my belt. This helps you decide whether to position the casing above or below the traced line.
I chose to place my casing just below the traced line, but you can adjust it based on your personal preference and waist height. Remember, the casing will sit about 1/2 inch below the marked line, so take that into account. Fold one short end of the casing by 1/2 inch toward the wrong side, and pin the top edge of the casing to the placement line, starting at one side seam. Continue pinning all the way around until you return to the same side seam. Fold the other short end of the casing in the same way so the folded edges meet at the side seam. Trim any excess length and sew the casing to the dress with a 1/2-inch seam allowance.
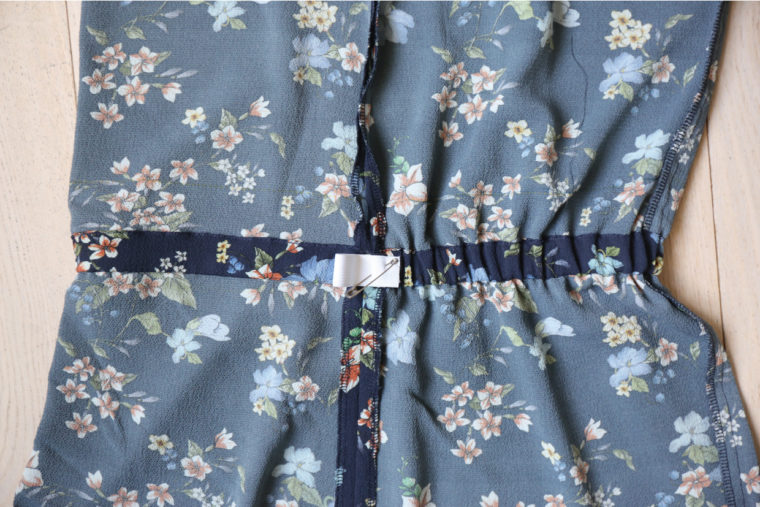
Turn the casing so the right side is facing outward, and press it along the stitching. Next, edgestitch the folded long edge of the casing to the dress. At this point, all the edges are tucked under neatly, so the casing looks tidy from both sides, with only two rows of stitching visible externally.
The final step is threading the elastic through the casing. Cut a piece of elastic between 1/2 inch and 3/4 inch wide, thread it through the casing, and pin it to your desired length. It’s helpful to try the dress on again (inside out) to ensure the fit feels right. Once you’ve adjusted the elastic to your liking, sew the ends together. You can hand-stitch the opening shut if you prefer, but I usually leave it open because it’s small and makes future adjustments easier.
There you go! That wasn’t too complicated, was it?


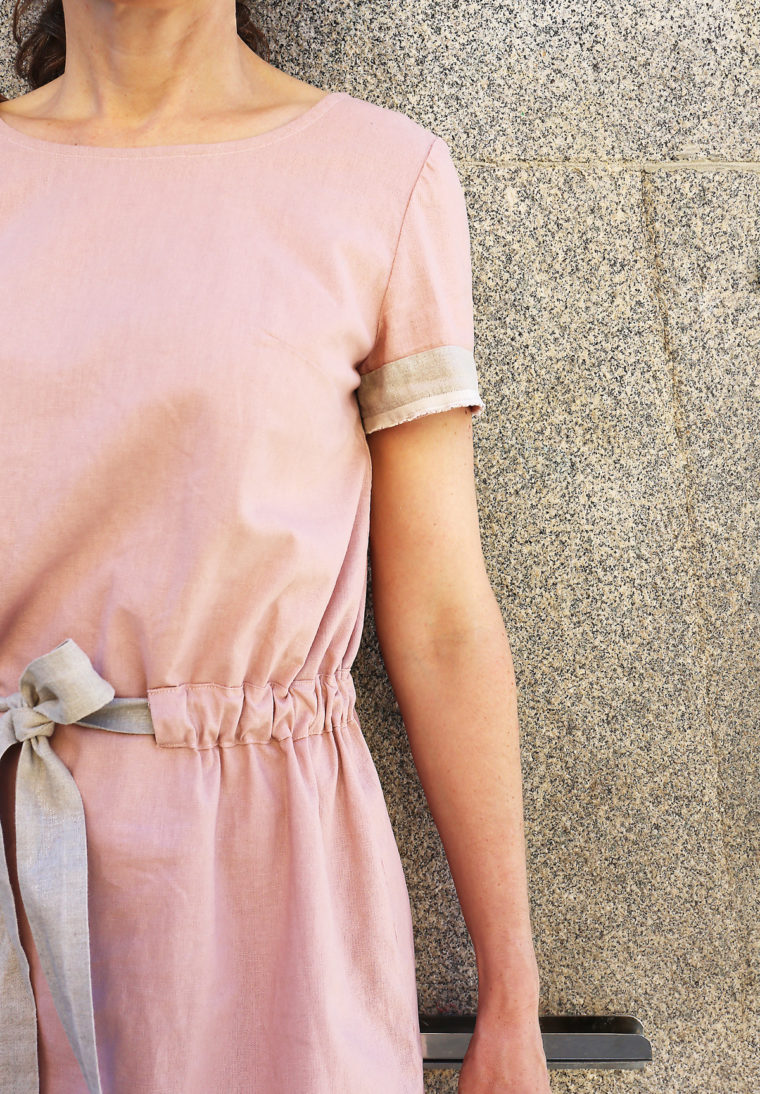
If you prefer, you can also attach the casing to the outside of the dress, similar to my pink version from last summer. For that dress, I left a gap at the center front to accommodate a drawstring. If you'd rather use elastic without an obvious opening, simply move the gap to the side seam and hand-stitch it closed after inserting the elastic.
I hope you’ll give this technique a try and share your creations using #lieslandco and #gelatoblousedress. Let me know how it goes!
In case you're wondering, there are countless ways to tweak patterns like the Gelato Dress. Adding a casing is just one example of how you can customize your wardrobe. Whether you opt for elastic or a drawstring, the possibilities are endless. So why not experiment and see what works best for you?
Let me know if you have any questions or need further guidance. Happy sewing!
Fake Fur Coats,Faux Fur Jacket,Ivory Fur Coat,Warm Fur Jacket
SHAOXING YINBO IMP&EXP CO.,LTD , https://www.yinbotex.com